


Creating patterns using stencils is a fun and straightforward way to bring designs to life. Whether you’re updating a wall, adding character to furniture, or personalizing clothing, stencils make it easy to achieve precise and repeatable patterns. The best part? You don’t need to be an artist to create something beautiful. Let’s get into how you can use stencils effectively to create patterns that stand out.
Choose the Right Stencil for Your Project
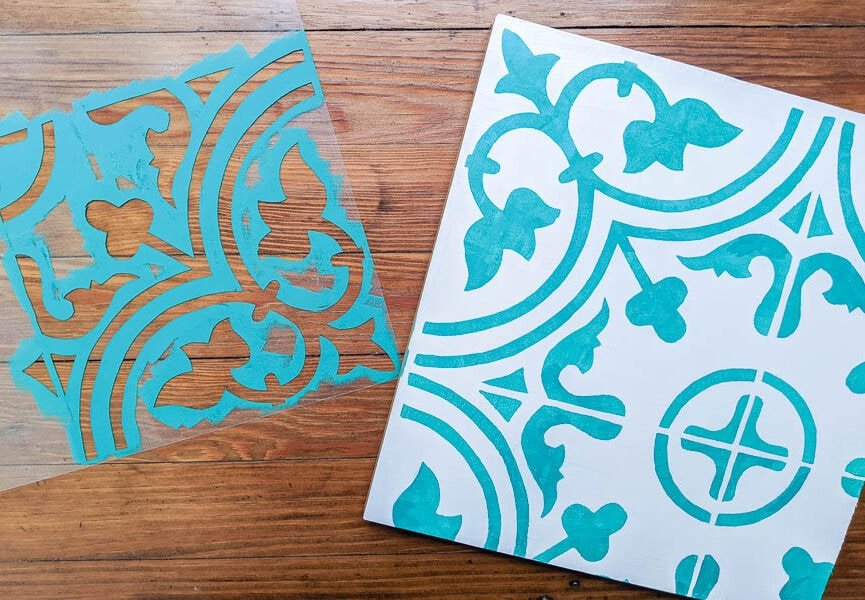
The first step in learning how to create patterns using stencils is selecting the right stencil. Stencils come in many shapes, sizes, and designs, so think about what fits your project. For walls or large surfaces, go for bigger stencils to cover more area. For smaller crafts, intricate or delicate designs might work better.
Consider the material too. Plastic stencils are durable and reusable, while paper stencils are ideal for one-time use. Once you pick the right stencil, you’re ready to move on to the next step.
Prepare Your Surface
Before you start, make sure the surface you’re working on is clean and smooth. This step is essential because any dirt or unevenness can ruin your design.
If you’re painting a wall, wipe it down to remove dust and debris. For furniture, sand it lightly to ensure the stencil sits flat. When working with fabric, wash and iron it first to create a wrinkle-free surface. Preparing your surface ensures your stencil sticks properly and the paint adheres evenly.
Gather the Right Tools
To create patterns using stencils, you’ll need the right tools. Besides your stencil, have paint or ink, painter’s tape, brushes, or a sponge. A stencil brush or foam roller is ideal because they give you control and prevent paint from seeping under the edges.
Make sure you also have a palette or tray to hold the paint. A small amount of paint goes a long way, so it’s best to work with thin layers to avoid smudges.
Secure the Stencil in Place
Securing the stencil is one of the most important steps when creating patterns using stencils. Use painter’s tape to hold the stencil in position. This prevents it from shifting while you’re applying paint.
If you’re working on fabric, consider using spray adhesive to keep the stencil firmly in place. A secure stencil ensures sharp and clean lines, giving your pattern a professional look.
Apply the Paint Carefully
When applying paint, use a light, tapping motion instead of brushing or dragging. Too much paint can bleed under the edges, ruining your design.
Dip your stencil brush or sponge lightly into the paint and dab off any excess onto a paper towel. Build up the color gradually with multiple thin layers. This technique helps you control the paint and achieve crisp, clean edges.
Repeat for a Seamless Pattern
If you’re creating a repeated pattern, align the stencil carefully to maintain consistency. Many stencils have guide marks to help you position them correctly.
Overlap the edges slightly to ensure the design flows seamlessly across the surface. Whether you’re decorating a wall or creating a border on fabric, patience is key to making the pattern look perfect.
Allow the Paint to Dry
After you finish painting, give the design time to dry before removing the stencil. Pulling the stencil off too soon can smudge the pattern.
Once the paint is dry, peel the stencil off carefully. If you’re reusing the stencil, wipe it clean with a damp cloth to remove any leftover paint. This keeps your stencil in good condition for future projects.
Add Finishing Touches
After creating your pattern using stencils, inspect it for any imperfections. If there are small mistakes, use a fine brush to touch them up.
For added durability, consider sealing your work. A clear protective spray or varnish can preserve your design and keep it looking fresh over time.
Experiment with Colors and Layers
Don’t be afraid to get creative! Stencils are versatile, and you can experiment with different colors, gradients, or layering multiple designs.
For instance, try using two stencils together to create a unique pattern. Layering shapes or adding metallic paints can give your project a dynamic and customized look.
Conclusion
Creating patterns using stencils is a simple yet rewarding process that anyone can master. By choosing the right stencil, preparing your surface, and applying paint carefully, you can achieve stunning results. Remember to secure your stencil, work with thin layers of paint, and be patient as you align repeated patterns.
Whether you’re updating your home décor, personalizing clothing, or crafting something special, stencils open up endless possibilities. With these tips, you’re well on your way to creating beautiful, harmonious patterns with confidence.


